pepparkakor

Processed with VSCO with f2 preset

Somehow, in my years of baking – before, during, and after living in Scandinavia – I had never before made the classic Scandinavian Christmas cookie: pepparkakor, as they’re known in Swedish (spelled pepperkaker in Norwegian), which are thin, crisp ginger snaps. When my friend Liv invited me to take part in a Christmas cookie exchange, I saw the perfect opportunity to remedy that situation.

I mentioned in my last post here, months ago, that we were getting ready to leave Norway. It’s funny how sometimes you don’t realize how settled you feel in a place until you leave it; in September we moved to Montréal, Canada, and after several months here we are just now starting to feel at home in our new apartment. It’s been a slow transition, but I’m finally enjoying making food in our kitchen (hurra!), and I definitely enjoyed baking this classic Christmas cookie. Thanks to the array of spices in this dough, it is incredibly fragrant (it genuinely smells like gløgg, or mulled wine), and cutting out shapes with cookie cutters evokes a childlike glee within me, so how could I not?

Processed with VSCO with f2 preset

I’m so happy that Liv introduced me to the idea of a cookie exchange, too. Here’s the basic concept: gather a small-to-medium sized group of people (say, 4-8 people). Each person picks a cookie recipe to bake, and then you bake a dozen cookies for each person in the group. After the cookies are baked, you meet up for a little holiday gathering, and you swap cookies with each person in the group, so that you dole out a dozen of your own cookies to each person (keeping a dozen for yourself), and you receive a dozen cookies of different types from each person in the group. With our group of eight, we each went home with a selection of eight different kinds of cookies, but we each only had to bake one kind. You then have plenty of cookies on hand for holiday parties, gifting, or simply snacking on over the break. Is that not the most genius thing ever?

So, as I mentioned, I decided to bake pepparkakor. I looked around at several different recipes – classic as they are, there can be quite a lot of variation in recipes for these cookies. While ginger and cinnamon are basically always included, you may or may not see cardamom, grated orange peel, and even pepper (hence the name!). In fact, during my time in Norway I realized that whether or not pepperkaker should include actual black pepper is somewhat of a perpetually ongoing debate. There are also differences in whether recipes use molasses, golden syrup, or something else. In the end I decided to use the recipe from Fika by Anna Brones and Johanna Kindvall. I knew I wanted to use the Dala horse cookie cutters my in-laws gave me a few Christmases ago, so going with a Swedish recipe felt appropriate.

Processed with VSCO with f2 preset

This recipe includes ground cinnamon, ground cardamom, ground cloves, and ground ginger. I took the time to grind the cardamom, cloves, and ginger fresh, and I think that truly makes all the difference in the world. These would have been lovely if I’d used pre-ground spices, but they’re truly delightful with the fresh ground spices instead. It also does include a wee bit of black pepper, and I suppose I ground that fresh as well!

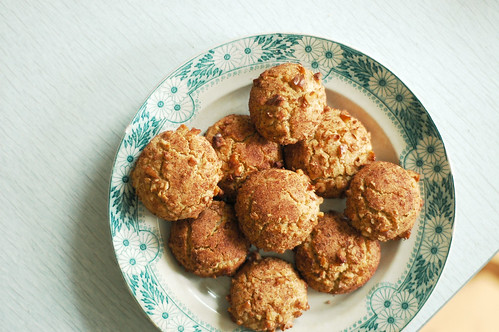
I decorated a few of the cookies – two per person for the cookie exchange – but pepparkakor are delicious with no frills at all so I left the majority like that. I did have fun icing the few cookies I decorated, though. The stark white icing against the rich brown of the cookies is pretty, isn’t it?

Processed with VSCO with f2 preset

If you’re interested in making some pepparkakor of your own, Fika is one of my favorite Scandinavian recipe books and I’d definitely recommend it! Or you could give my friend Daytona’s Norwegian recipe a try instead, as it’s available for free on her blog, Outside Oslo.

syltgrottor

syltgrottor2

It’s been a little quiet on this blog but this time, it’s not because I haven’t been baking! It just turns out that a lot of things fall by the wayside when you’re also writing a master’s thesis. So I’m working to catch up on a few things!

One Saturday in February, my friend Anna came over for some tea and knitting in the afternoon. We’d both been feeling the winter blues a little bit, but these thumbprint cookies from Fika, called syltgrottor in Swedish (or “jam caves”), definitely helped raise our spirits.

syltgrottor1

Fruit and jam types of cookies were never my favorite growing up – I wanted rich chocolate in my cookies basically all the time – but as an adult I’ve really come around to them. This recipe calls for Queen’s jam, which there’s a recipe for in Fika – it’s a jam with equal parts raspberry and blueberry. I didn’t have any of that, however, so I just used plain old raspberry jam. It was still absolutely delicious, but with the subtle anise flavor of these cookies, I can see how the flavors of the Queen’s jam would be a winning match!

These cookies are meant to be baked in small paper liners, but I spaced out and forgot to pick up any at the store when I bought ingredients, so we just baked them right on a baking sheet with parchment paper, which worked absolutely fine. I’d love to give them another go with paper liners, however.

syltgrottor3

Fika continues to be one of my favorite baking books, one that I reach for most often now. And I can definitely see myself making these again. Do you have a favorite type of thumbprint cookie?

You can find the recipe for these cookies in Fika by Anna Brones and Johanna Kindvall.

And a quick P.S. for anyone who enjoys Scandinavian design as much as I do! The authors of Fika are both talented artists, and Anna has just started the 100 day project on her Instagram with the goal to make one papercut piece every day for 100 days inspired by classic Scandinavian design (be still my heart!). You can check out the first post here (she kicks off with Stig Lindberg’s Berså), and be sure to follow Anna if you want to watch the project unfold.

havrekjeks

havrekjeks2

Oats are easy to find in Norway. Havregryn (or rolled oats) comes in small and large varieties, havregrøt (oatmeal) is a common breakfast – the kind I like has cardamom to boot! Havremelk (oat milk) is a common non-dairy substitute, and my grocery store even carries an oat-based non-dairy creme fraiche. And then there’s havreflarn and havrekjeks, different types of cookies made from oats. Since making the havreflarn med choklad from Fika, I’ve been experimenting with oat cookie recipes, and now I’ve had one published in the Norwegian American Weekly.

havrekjeks3

My havrekjeks are thin and chewy, with chocolate chips. I never was a fan of oatmeal raisin cookies, but oats and chocolate is a combo I can get behind. You can find the full recipe for these over at na-weekly.com.

havreflarn med choklad

IMG_6452

I’m back in Tromsø after spending Christmas break in Seattle, but it was such a busy month with so much work and (literal) housekeeping to do that I didn’t have time to do any Christmas baking (boo). It’s been quite cold in Tromsø since I got back, however, which is the perfect excuse to be baking – nothing warms up the house like a hot oven, you know?

Since moving to Norway I’ve become rather obsessed with a certain local company’s havrekjeks – that is, oat cookies. They’re the perfect crisp and crunchy consistency with chocolate chips and I love them. I thought it’d be fun to find an oat cookie recipe to try from my Nordic cookbook library (so that I don’t spend all my money on Bakehuset’s cookies).

havreflarn med choklad 5

I picked out the havreflarn med choklad from Fika, the book I introduced in my previous post. Unlike Bakehuset’s havrekjeks, these cookies don’t have chocolate chips, but they do form a cookie sandwich with a chocolate filling.

havreflarn med choklad 4

This was a very straightforward recipe, with a few prep steps (my rolled oats needed to go through the blender for a minute to bring the size down, and the chocolate for the filling has to be melted once the cookies have cooled) but mostly instructions along the lines of mixing everything together and dropping dough on the cookie sheets. I made my cookies too big at first, which took me a little while to realize. I also stacked up my baking sheets in the oven, which meant that the cookies on top achieved the idea crunchy crisp consistency I was going for while the cookies on the baking sheet below stayed a little softer (still crisp, but with a softer texture, if that makes any sense). In the photos, the cookies that were on the bottom rack have a smoother texture with larger bubbles.

havreflarn med choklad 6

The wild card in this recipe was that the chocolate filling contains ground ginger. I love ginger, but after making these cookies, I don’t know if I love ginger with chocolate. I feel like I might swap the ginger for cardamom next time I make these. Or perhaps I’ll skip the chocolate filling altogether and throw chocolate chips into the dough instead! Ginger aside, this was a really great basic recipe for oat cookies that I’ll happily make again in different iterations in the future.

You can find the recipe for these cookies in Fika by Anna Brones and Johanna Kindvall.

kanelkakor

I have long had an aversion to walnuts in baked goods, largely because I can’t stand walnuts in two of the most basic American baked goods there are: brownies and chocolate chip cookies. They’re very polarizing in these two cases; some people love them, some detest them. I’ve always fallen into the latter camp. I think walnuts will always ruin what is otherwise a perfectly delicious brownie or chocolate chip cookie. I never wanted them in muffins, either, no matter what kind of muffin.

I don’t dislike walnuts as a rule. Growing up, the stuffing my mother made for Thanksgiving dinner every year contained walnuts, and it was often my job to crack the walnuts open as we were prepping. I enjoyed this task immensely, and I often enjoyed snacking on the walnuts, too. To this day, whenever I eat walnuts on their own, the smell and the taste take me straight back to sitting at the kitchen table on Thanksgiving morning with the parade on the television, cracking open walnuts as my brother and I helped mom prepare for dinner.

The good news is, I’ve found a cookie with walnuts that I really, really like: Swedish Cinnamon-Walnut Cookies.

I’m in Oslo for the summer, and it’s largely been a very warm, very sunny summer. The weather’s finally cooled off, though, and some rain systems have moved in, so my friend Alex (the same one mentioned here) came over to bake with me yesterday. We decided to try these cinnamon walnut cookies – it’s a very simple recipe which doesn’t need very many ingredients, so we were mostly stocked up already. I also had some pretty divine French butter I bought at Mathallen that I thought would work quite well (when ingredients are few and simple, it always pays to use the best quality ingredients you can). As it was a Sunday (most grocery stores in Norway are closed on Sundays), I popped down to the local greengrocer/import store which was open to see if they had any vanilla extract. They didn’t, but they did have vanilla bean – and as it turns out, if you scrape out the seeds from the bean, you can use those as a substitute. It’s a much lengthier process than measuring out a teaspoon of vanilla extract, but the cookies definitely didn’t seem to suffer as a result. Alex and I simply dispersed the seeds in a small bowl with the egg (the closest thing to a liquid ingredient) before beating it into the dough.

I think using the nice French butter really paid off. The dough alone was exquisite. And as I mentioned, very few ingredients were needed: the dough was made from butter, sugar, flour, egg, cinnamon, and vanilla.

After the dough was chilled for 30 minutes, we pulled it out of the fridge. Small pieces were rolled into balls, which were then rolled in a blend of cinnamon, sugar, and chopped walnuts, and then placed on the baking sheet.

The balls of dough flatten out into the loveliest little domes in the oven. The resulting cookie was something like a snickerdoodle, but lighter, fluffier, and covered in walnuts. They were delicious. These would make a perfect Christmas cookie, and I’m already looking forward to making them again during the holiday season. I’m very pleased to have found a walnut cookie I love.

krumkake

This time a week ago, I was in Norway preparing to eat a home-cooked meal at the family home of my friend Camilla. I stayed with Camilla at her flat in Oslo all weekend, but Sunday night we made the trip up to Bærum to see her family. We decided in advance that we would make krumkake – trying out the recipe in The Great Scandinavian Baking Book, of course – for her family as a thank you and an opportunity to get a head start on the holiday season.

Krumkaker are absolutely a Norwegian Christmas tradition, and one that many of my Norwegian American friends grew up with. They’re made using a krumkakejern, or krumkake iron, much like a waffle iron but covered in beautiful patterns. Traditional irons are used on the stovetop and must be flipped to ensure that both sides are fully cooked, but Camilla’s family has a modern electric version.

Once each krumkake is done cooking, you remove it from the iron and roll it around a small cone (or sometimes a cylinder) and let it cool on a rack. The result, to American eyes, looks a lot like a fancy waffle cone for ice cream (and in fact, the Parfait ice cream truck in Seattle uses a krumkakejern to make their waffle cones!). I’ve always had krumkake with whipped cream and fruit, but we made multekrem for our krumkaker at Camilla’s, or cloudberry cream. Cloudberries are arctic berries that grow around marshes in mountainous regions and are quite popular in Norway. Camilla whipped up the cream with some cloudberry jam and we were ready to go!

While I think the krumkaker could have been better – I may have whipped too much air into the batter before they went onto the iron – it’s hard to really mess them up too much and the finished cookies were a hit with everyone. Camilla’s father asked me, as we filled our krumkaker with multekrem and sipped on black coffee, “When are you coming back to make more cakes?”

So, well done, Great Scandinavian Baking Book. Your recipe passed the test with true Norwegians and I’ve got an open invite to come back to Oslo and do some more baking.

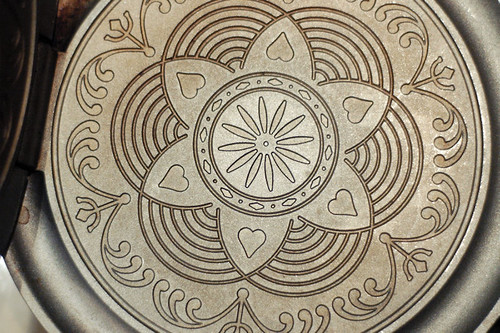
Camilla and I take our krumkake-making very seriously

store egg = large eggs

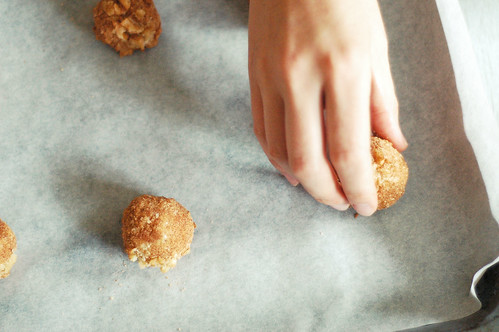
creaming the butter and sugar

krumkaker cooling

krumkaker, multekrem, og kaffe

mandelflarn (igjen)

Back in March I baked a Finnish strawberry tart out of The Great Scandinavian Baking Book for my friend Phil’s birthday and managed to lose my photos of it. Between the frustration of losing photos and getting caught up in my last quarter of grad school, I didn’t bake for awhile. But now school is finished and the summertime has brought on picnics and dinners with friends galore, and I actually have time and incentive to bake again! I opted to get myself back into it by repeating one of my favorite recipes, the mandelflarn, or Norwegian almond cookies first featured here. You can rest assured I’ll give the strawberry tart another go, because it was quite delicious and it’s a great recipe for summer.

I baked the mandelflarn along with some good old chocolate chip cookies, which we served with vanilla ice cream. It made for a nice light dessert for a backyard dinner with friends.

Rest assured: you’ll be seeing more from me this summer! I’ve got lots of recipes bookmarked to try out. And since this is a repeat recipe, I thought I might share something else with you. While this video doesn’t necessarily have anything to do with Scandinavian baking, it does have to do with baking, and it’s quite beautiful to boot. Check it out below:

beet cake from tiger in a jar on Vimeo.

berlinerkranser

This recipe makes a lot of cookies. A lot! I used half my dough yesterday, and I got 30 cookies out of that. The recipe says it makes 48, so perhaps mine are on the small side, but either way, that’s quite a few cookies! The other half is in the fridge, waiting to be baked this weekend. My friend Eric‘s birthday was yesterday, so I baked the first half for him and handed them off last night!

Berlinerkranser are named after Berlin, for whatever reason, and they’re basically little round cookie rings made from flour, eggs, butter, and sugar. Simple and delicious, this is definitely a recipe you can add to at will to spice it up if you’d like, but I made the recipe as written and these cookies stand on their own just fine. They’re not something to make in a hurry – once you make your dough you refrigerate it from 4-8 hours (I let mine refrigerate overnight). Being a rather inexperienced baker I had a moment of mild panic when I pulled my dough out of the fridge in the morning and it was rock hard, but I let it warm up for about twenty minutes and I was able to slice pieces off and added a little bit of water to make it more workable to form the rings. They looked a bit like oversized Cheerios before being baked, or tiny donuts, which was kind of cute.

After you form your rings you dip them in egg whites and then in sugar. I got a little overzealous on my first batch and sprinkled sugar on top of them after place them on the baking sheet, which just meant that the centers filled with sugar candy crystals as they baked, but the second batch went without the extra sprinkles and thus maintained their center holes.

All in all the recipe was simple to follow, the cookies are delicious, and I’m pretty happy I’ve still got dough in the fridge to bake!

mandelflarn

After the enormous klippekrans and the pastry-like herttaisetrinkilät, I decided I wanted to go for a cookie this time for something a little quicker and easier. Cookies don’t need yeast, they don’t require waiting around for dough to rise, and they’re small and manageable (not to mention tasty). I picked out the mandelflarn, which are Norwegian almond cookies, because they sounded delicious and looked simple.

I was happy to discover that they are quite simple indeed – the book describes them as spreading out “thin and crisp as they bake, with pale centers and crisp, golden edges.” The only thing that caught me off guard was that I had no idea just how much these cookies flattened out in the oven. I’d say the diameters of mine increased by about 2-3 inches, and they only started around 3 inches across. Alarmed at first, I worried I’d made some huge mistake in the rather short list of instructions, and had to do a Google image search. Thankfully, the internet soothed my fears by providing pages of photos of flat, crisp looking cookies, just like the ones I had baking in the oven. I waited until the edges began to brown before removing them.

After the cookies have baked, you have the option of cooling them flat or over a foil-covered dowel or other cylinder to give them a U-shape. I opted to try a few of the rounded ones and let the rest cool flat. I think I prefer the look of the cookies flat – but they taste great either way!